
EZSign
Simple Electronic Signature Capture for Salesforce®
Remote Signature Capture
Step-by-Step Process
To configure your Salesforce org so that you'll be able to collect signatures remotely via email, please follow the set of instructions outlined in Steps 1 thru 3 below. If you're using this capability with other standard or custom objects, be sure to follow Step 4 as well.
Step 1: Set Up Your Salesforce Domain and Site
- Go into the Setup Area for your Salesforce org.
- Under "App Setup" click "Develop" → "Sites".
-
If you don't already have a domain established for your Salesforce org, enter one here. Be careful here, though, because you can only do this once.
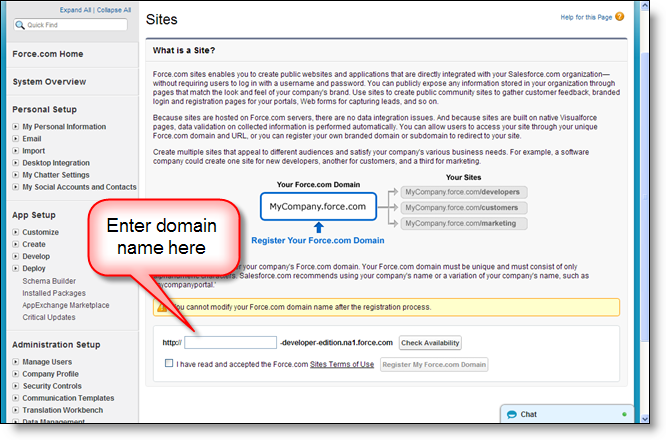
- Once you've determined that you like your domain name choice and it's available, agree to the Terms of Use and click the "Register My Force.com Domain" button.
-
Click the "New" button to set up a new site using your newly established domain.

-
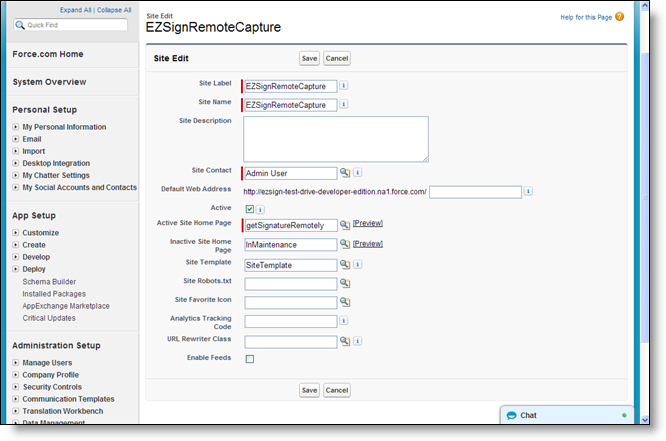
Enter the required information for the site (enter "EZSignRemoteCapture" for the Site Label and Site Name fields, check the "Active" box, and enter "getSignatureRemotely" for the Active Site Home Page field).
Click the "Save" button once you're done.
-
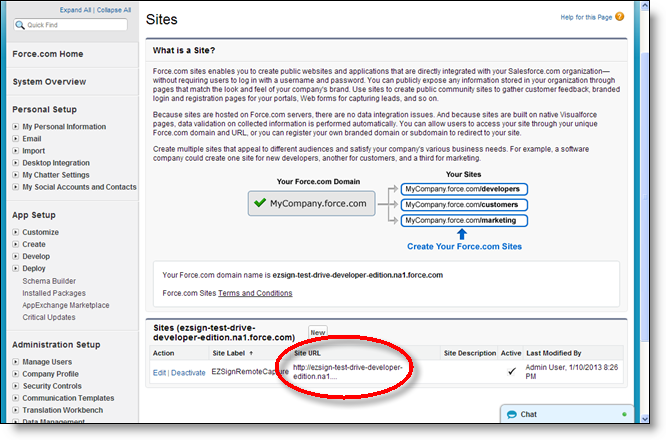
Copy the newly created Site URL to your clipboard or write it down for future reference.
-
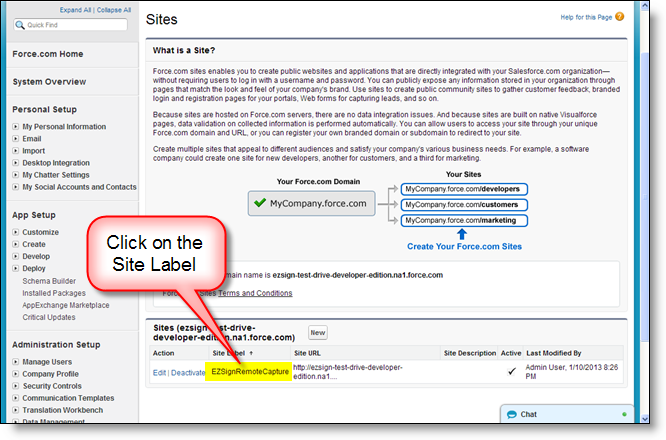
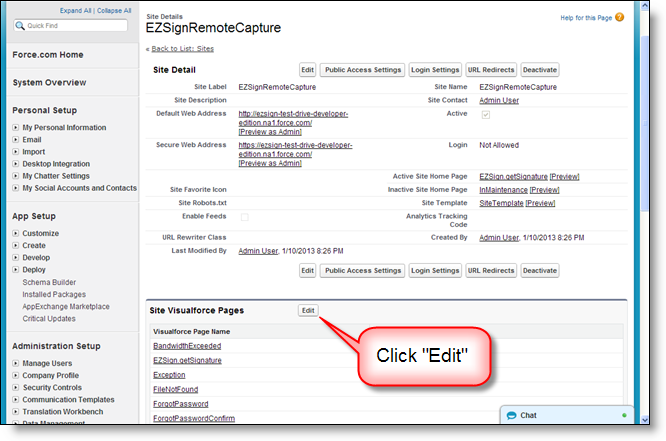
Click on the Site Label of your newly created site to modify the details.
-
Click the "Edit" button for Site Visualforce Pages.
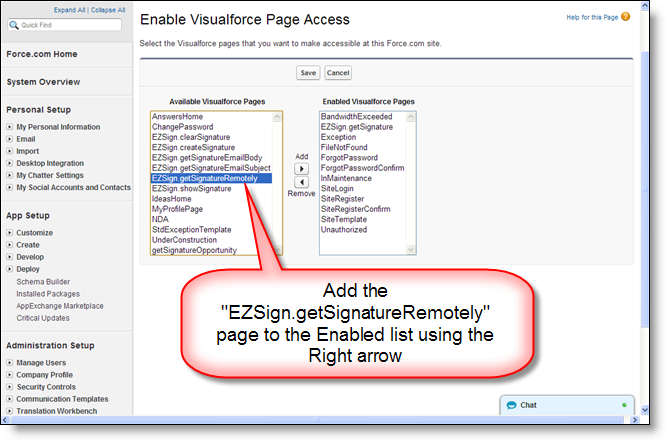
-
Click on the "EZSign.getSignatureRemotely" Visualforce page and then use the right arrow to add it to the Enabled list. Click the "Save" button once you're done.
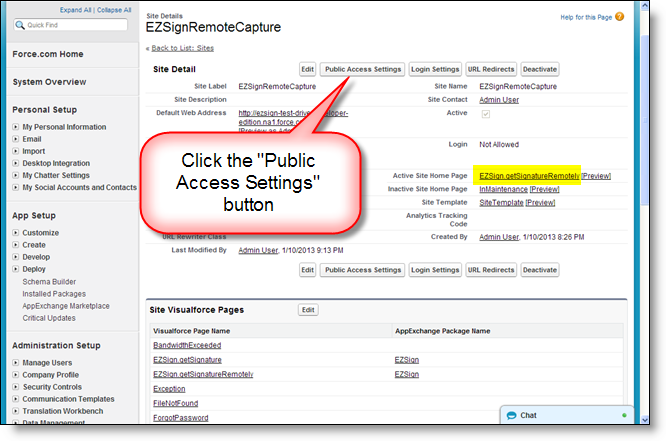
-
Click the "Public Access Settings" button.
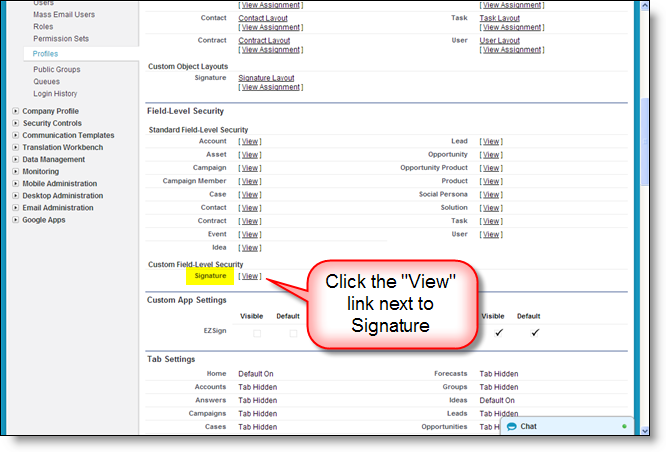
-
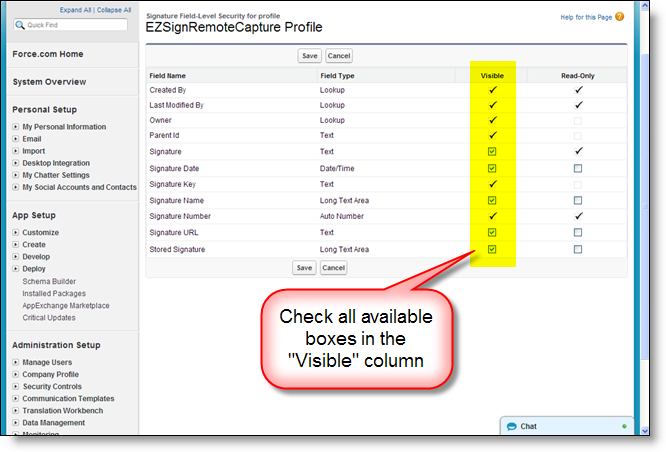
Scroll down to the Custom Field-Level Security section of the page and click the "View" link next to Signature.
-
Click the "Edit" button on the page, check off all the boxes in the "Visible" column, and click the "Save" button.
-
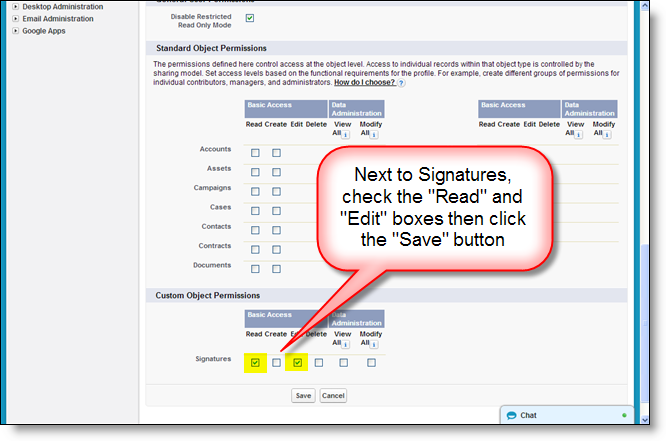
Click the "Back to Profile" button, scroll down to the Custom Object Permissions section of the page, and click the "Edit" button.

-
Next to Signatures, check the "Read" and "Edit" boxes and then click the "Save" button.
-
Scroll further down the page to the Enabled Apex Class Access section and click the "Edit" button.
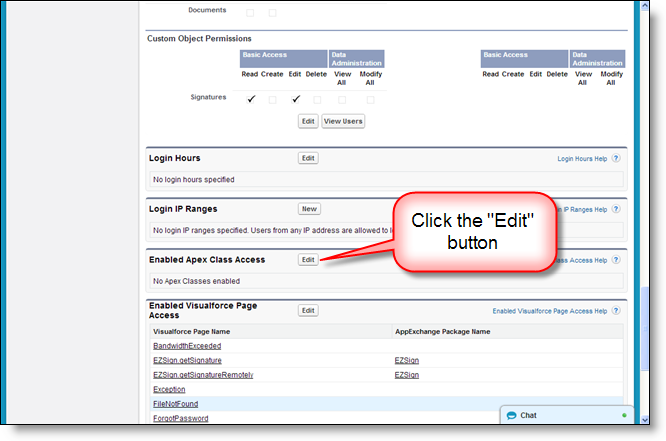
-
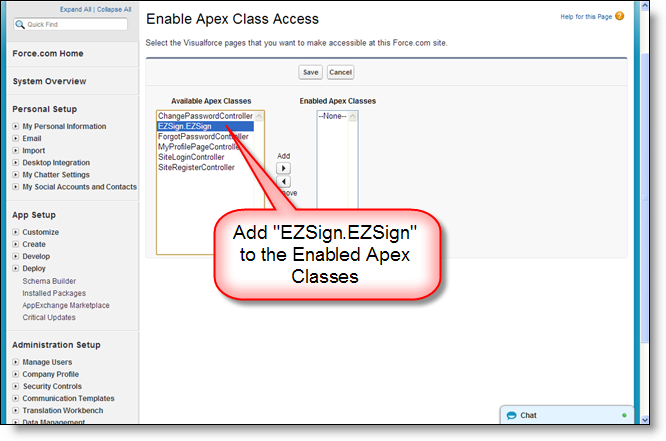
Add the "EZSign.EZSign" class under Available Apex Classes to the Enabled Apex Classes list using the right arrow. Click the "Save" button once you're done.
-
Scroll back up the page to Custom Object Permissions and click the "View Users" button.
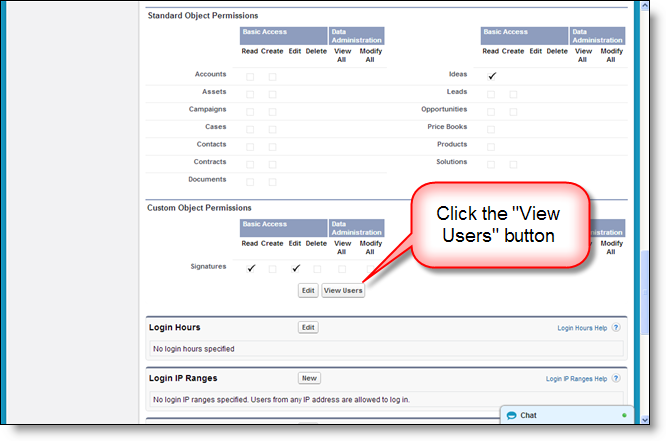
-
Click on the "Site Guest User" profile for EZSign.
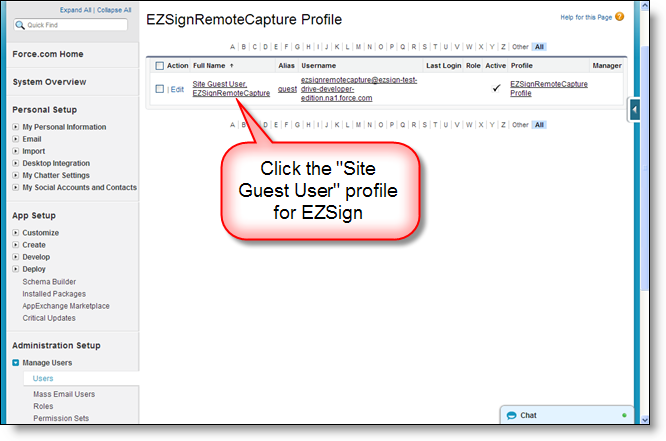
-
Click on the "Assign Licenses" button to assign licenses to the profile.
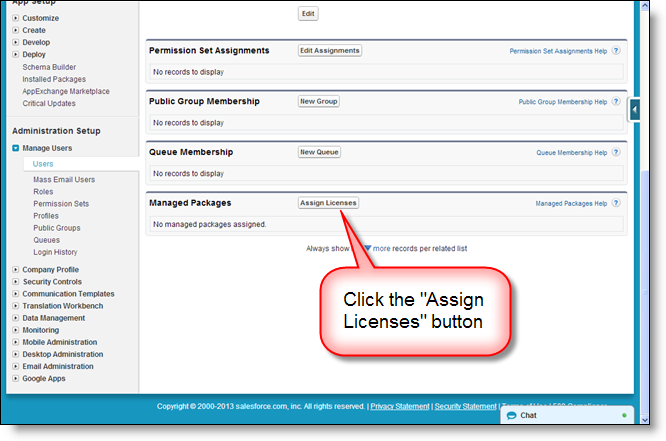
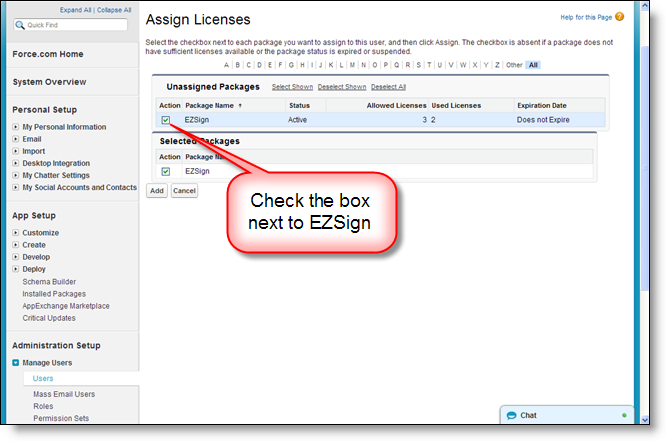
-
Check the box next to EZSign which will automatically check the EZSign box under Selected Packages. Click the "Add" button once you're done.
NOTE: You will need to assign an EZSign license to to the "Site Guest User" account in order to take advantage of the remote signature capture capability. If you don't have a license available, you
can purchase one from the EZSign listing on the AppExchange.
Step 2: Modify the EZSign Custom Settings
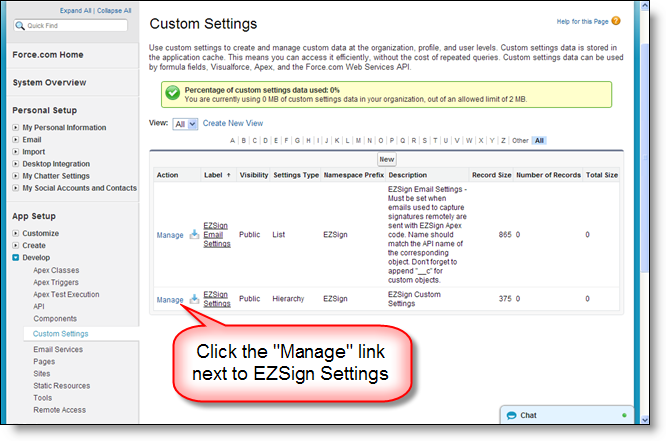
- Under "App Setup" in the Salesforce Setup area, click "Develop" → "Custom Settings".
-
Click the "Manage" link next to "EZSign Settings".
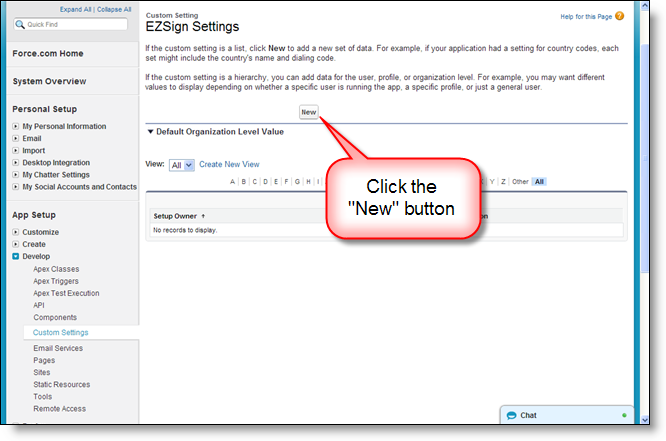
-
Click the "New" button.
-
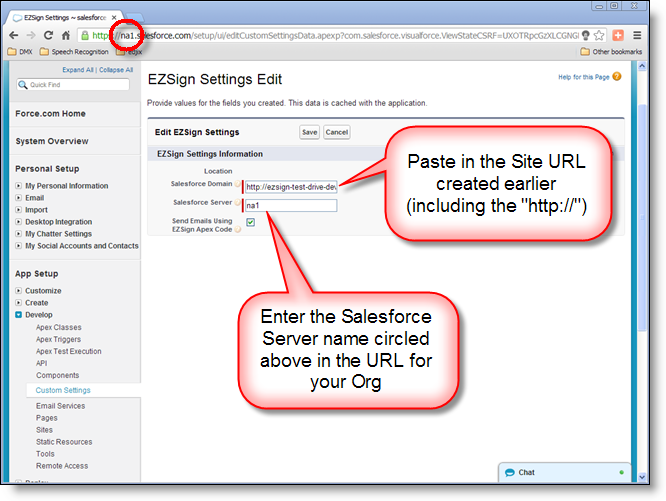
Paste or type in the "Site URL" created earlier (including the "http://"), enter the Salesforce Server name found in the URL for your Org, and click the "Save" button. NOTE: Uncheck the "Send Emails
Using EZSign Apex Code" box if you want to used Workflow Rules instead of Apex code to send emails for capturing signatures remotely. If you have the "Group" or "Professional" edition of Salesforce, this
field must be set to true.
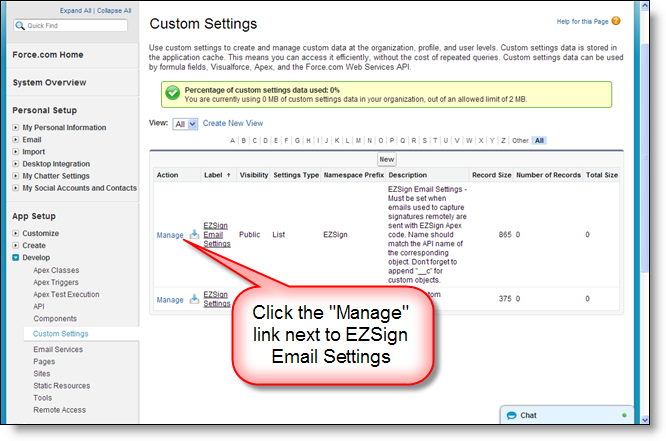
- Click on "Custom Settings" under the "Develop" section of "App Setup".
-
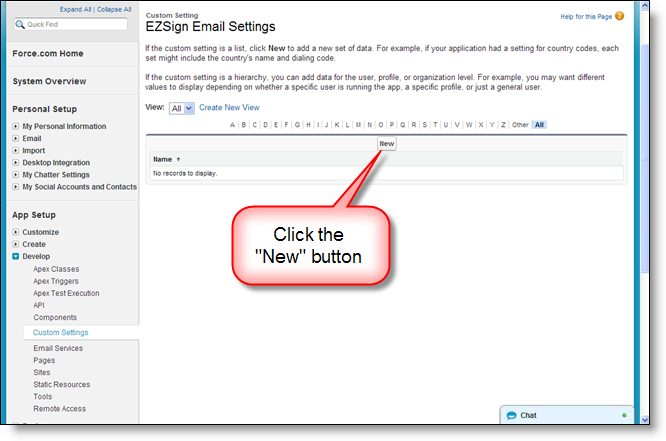
Click the "Manage" link next to "EZSign Email Settings".
-
Click the "New" button.
-
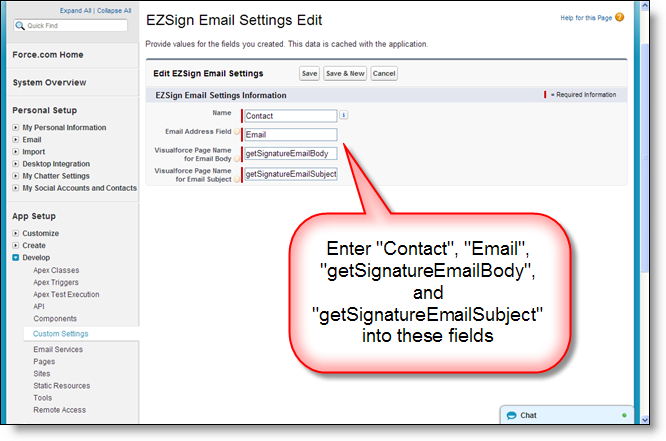
Enter "Contact", "Email", "getSignatureEmailBody", and "getSignatureEmailSubject" into the fields on the screen. Click the "Save" button once you're done.
Step 3: Add the "Get Signature Remotely" Button to the Page Layout
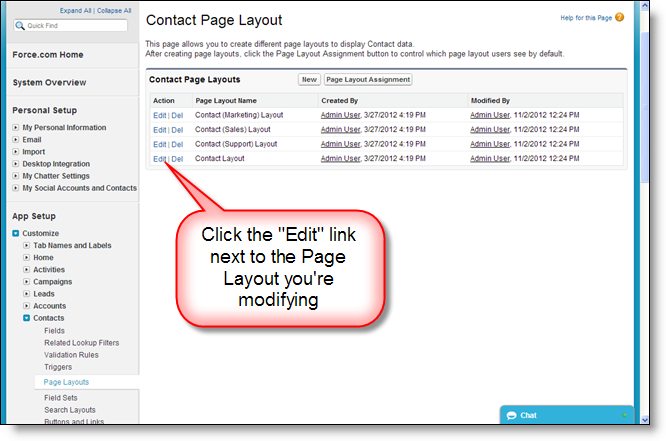
- Click on "Page Layouts" for "Contacts" under the "Customize" section of "App Setup".
-
Click "Edit" next to Contact Layout (or whatever Page Layout you're working with).
-
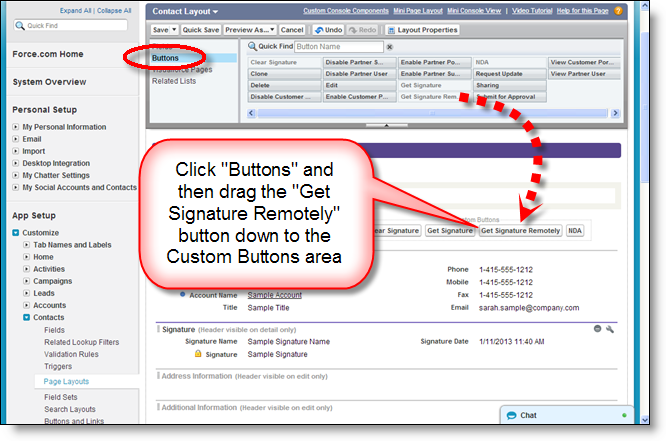
Click the "Buttons" link to show all available buttons and then drag-and-drop the "Get Signature Remotely" button down to the Custom Buttons section of the page layout. Click the "Save" button once you're
done.
Step 4: Working with Other Standard or Custom Objects
If you're using EZSign with other standard or custom objects, follow this additional set of instructions:
- Duplicate the "getSignatureEmailBody" and "getSignatureEmailSubject" Visualforce Pages that come with EZSign and modify the "standardController" in the <page> declararion so that the pages are associated with the object you're working with (e.g., standardController="Opportunity"). NOTE: Don't forget to assign the appropriate "Security" to these pages once they're created.
- Navigate to "Custom Settings", click the "Manage" link next to "EZSign Email Settings", click the "New" button, enter the API name of the standard or custom object you're working with in the Name field (e.g., "Opportunity" or "YourObjectName__c"), specify the API name of the email field used in your standard or custom object (e.g., Email__c), and enter the names of the two Visualforce pages you just created that represent the Body and Subject of your automated email message.
- Modify the "Custom Field-Level Security" settings for the standard or custom object you're working with to make the EZSign fields visible (see instructions 12 & 13 above).
- Create the "Get Signature Remotely" button for your standard or custom object (already described on the main EZSign documentation page) and add it to the page layout.